This post shows how to use the libwebsockets library to build a server. This tutorial is largely derived from an old one with a little code modifications.
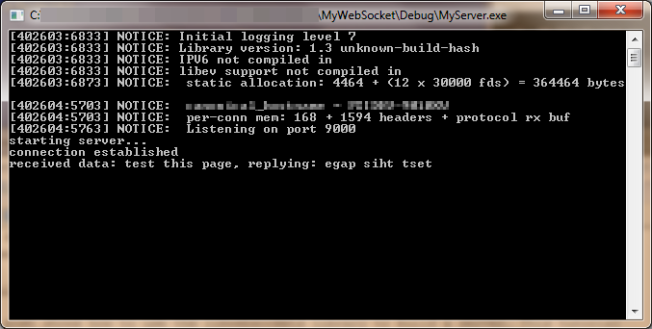
First of all, lets try out the end product. Download the sample code, compile and run it. It’s a console application which will show some message telling you that the server is running and listing to port 9000:

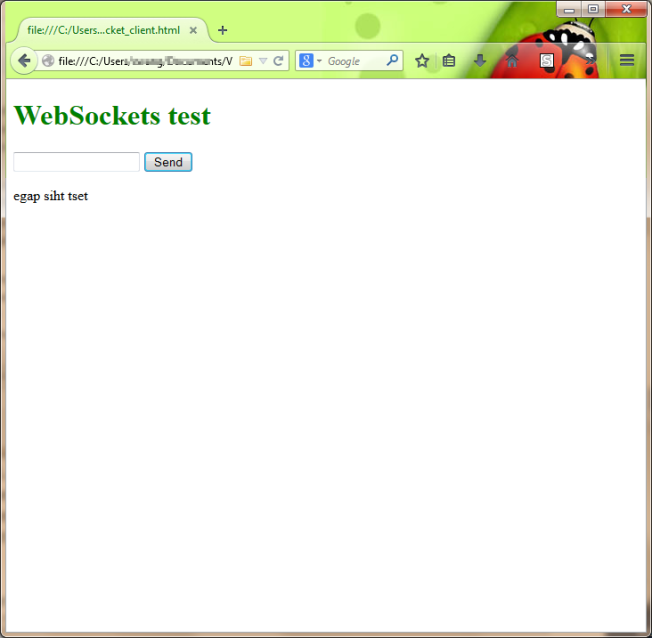
Next, open the ‘websocket_client.html’ included in the package, type something in the text box and hit ‘send’. This sends the string to the server. The server reverse the string and return it to the client. You can also see from the console window what server did with the string.
now lets take a look on the code. first, you probably will notice ‘libwebsockets.h’, ‘websockets.lib’ and ‘websockets.dll’. These are the files we get by compiling the libwebsockets library. The header file is directly copied over from the source. Our code is in ‘server_test.cpp’ shown as follows:
#include <stdio.h>
#include <stdlib.h>
#include "libwebsockets.h"

#pragma comment(lib, "websockets.lib")

static int
callback_http(struct libwebsocket_context * that,
struct libwebsocket *wsi,
enum libwebsocket_callback_reasons reason,
void *user,
void *in,
size_t len)
{
return 0;
}

static int
callback_dumb_increment(struct libwebsocket_context * that,
struct libwebsocket *wsi,
enum libwebsocket_callback_reasons reason,
void *user,
void *in,
size_t len)
{
switch (reason) {
case LWS_CALLBACK_ESTABLISHED: // just log message that someone is connecting
printf("connection established\n");
break;
case LWS_CALLBACK_RECEIVE: { // the funny part
// create a buffer to hold our response
// it has to have some pre and post padding. You don't need to care
// what comes there, libwebsockets will do everything for you. For more info see
// http://git.warmcat.com/cgi-bin/cgit/libwebsockets/tree/lib/libwebsockets.h#n597
unsigned char *buf = (unsigned char*) malloc(LWS_SEND_BUFFER_PRE_PADDING + len +
LWS_SEND_BUFFER_POST_PADDING);

// pointer to `void *in` holds the incomming request
// we're just going to put it in reverse order and put it in `buf` with
// correct offset. `len` holds length of the request.
for (size_t i=0; i < len; i++) {
buf[LWS_SEND_BUFFER_PRE_PADDING + (len - 1) - i ] = ((char *) in)[i];
}

// log what we recieved and what we're going to send as a response.
// that disco syntax `%.*s` is used to print just a part of our buffer
// http://stackoverflow.com/questions/5189071/print-part-of-char-array
printf("received data: %s, replying: %.*s\n", (char *) in, (int) len,
buf + LWS_SEND_BUFFER_PRE_PADDING);

// send response
// just notice that we have to tell where exactly our response starts. That's
// why there's `buf[LWS_SEND_BUFFER_PRE_PADDING]` and how long it is.
// we know that our response has the same length as request because
// it's the same message in reverse order.
libwebsocket_write(wsi, &buf[LWS_SEND_BUFFER_PRE_PADDING], len, LWS_WRITE_TEXT);

// release memory back into the wild
free(buf);
break;
}
default:
break;
}

return 0;
}

static struct libwebsocket_protocols protocols[] = {
/* first protocol must always be HTTP handler */
{
"http-only",   // name
callback_http, // callback
0              // per_session_data_size
},
{
"dumb-increment-protocol", // protocol name - very important!
callback_dumb_increment,   // callback
0                          // we don't use any per session data
},
{
NULL, NULL, 0   /* End of list */
}
};

int main(void) {
struct libwebsocket_context *context;
// server url will be http://localhost:9000
// we're not using ssl
// no special options
struct lws_context_creation_info info;
memset(&info, 0, sizeof info);
info.port = 9000;
info.gid = -1;
info.uid = -1;
info.protocols = protocols;

// create libwebsocket context representing this server
context = libwebsocket_create_context(&info);

if (context == NULL) {
fprintf(stderr, "libwebsocket init failed\n");
return -1;
}

printf("starting server...\n");

// infinite loop, to end this server send SIGTERM. (CTRL+C)
while (1) {
libwebsocket_service(context, 50);
// libwebsocket_service will process all waiting events with their
// callback functions and then wait 50 ms.
// (this is a single threaded webserver and this will keep our server
// from generating load while there are not requests to process)
}

libwebsocket_context_destroy(context);

return 0;
}
Lets start with the main(), which shows the main workflow.
- Ln87 – 99 fill out a socket context structure (struct libwebsocket_context) which defines key attributes such as port, supported protocols etc. And create a socket with it.
- Call libwebsocket_service() within a infinite loop to start the server, Ln 109-115
- call libwebsocket_context_destroy() to clean up before exit. Ln 117
When you write your own server, you probably will not change much code in the main(). Instead, most of the work is in defining the supported protocols and its callbacks.
As seen in Ln 96, when defining supporting protocols for this server, we need to provide a ‘struct libwebsocket_protocols’ array (defined in Ln 69), this array provides callbacks for each supported protocol.
The behavior of the server is mostly defined by these callbacks. callback_dumb_increment() is where the server handles all different messages. Especially, when there are data arrives from the client, it reverse the string. The comments provide some details about the implementation. You may also want to refer to ‘libwebsockets.h’.
On the client side, if you open ‘websocket_client.html’, you will see code that create and open a websocket, as well as the handler for receiving result from server.
That concludes a simple server written with libwebsockets library.